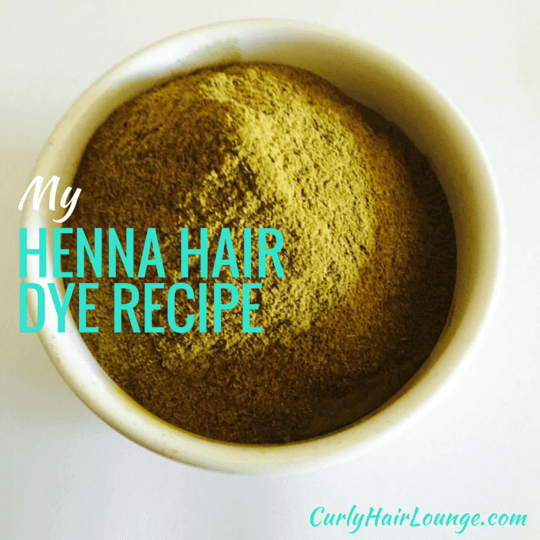
If you read my Henna For Hair Care post you know what henna can do for natural hair and you know I am a great supporter of its use. That is why today I am sharing my current henna hair dye recipe. Chances are that if you are reading this post you’re curious about henna and want to know more about it, so if you haven’t read my article I highly advise you to back and read it once you check out this little recipe of mine.
I initially started looking for information about henna when I understood it was a natural solution to cover my grey hairs. Early on my transitioning journey, as I got educated about natural hair, I decided to go natural using the least possible synthetic chemicals on my hair products. This meant using products with natural ingredients that can benefit my hair to the maximum, even if the results are not so immediate or visible. I don’t mind it because I know this will create a strong foundation from which my hair will grow strong and healthy. Don’t get me wrong, sometimes I compromise in the choices I make, but I always read the label. This is very important!
So now to my henna recipe. I created this recipe while researching for plant dyes I could use with henna to make my own custom hair dye. I have dark brown hair and although I’ve always secretly loved black hair, I decided it would make me look gloomy/older and opted for dark burgundy tones. To achieve this used black tea, hibiscus and a few other plants have a look.
Black Tea – It adds shine, protects from UV damage, it soothes the scalp preventing dandruff and itchiness, brings dark hair back to life with natural highlights and helps to “colour” grey hairs.
Hibiscus Powder – thought to promote hair growth, it is also helpful in the treatment of dandruff and hair loss. It closes hair cuticles preventing tangles and possibly breakage. Using it as a hair rinse or with henna will give you warm red hues.
Brahmi Powder – Nourishes and thickens hair follicles and strands so it’s good for hair thinning and preventing hair fall. It “coats” hair with a protective film that reduces split ends, adds shine and volume. Additionally, it is a great moisturiser that helps to prevent scalp issues such as dandruff and itchiness. Great for maintaining dark hair.
Bringraj Powder – Bringraj is considered the “king of herbs” and acts much like a vitamin cocktail for hair roots and strands. It’s commonly used in Ayurvedic hair remedies for premature hair greying, hair loss, split ends and alopecia as it strengthens hair roots, conditions the hair and stimulates hair growth. It will also give your hair amazing shine.
Henna – Is a powerful hair conditioner that coats hair strands flattening the cuticle layers, adding shine, preventing dandruff and itchiness and dying hair in a red-orange hue. For more read Henna For Hair Care.
RECIPE

Ingredients
1 1/2 cup BAQ Henna
1 tbsp. Brahmi Powder
1 tbsp. Bringraj Powder
1 1/2 tbsp. Hibiscus Powder
1 cup Yoghurt
Warm (not hot) Strong Black Tea
Juice of 1/2 Lemon
Mixture
Boil water and make some strong black tea with 3 or 4 tea bags and let it cool down completely. In a plastic or ceramic bowl/container (never use a metallic bowl) place your body art quality (BAQ) henna and other plant powders with the yoghurt. Squeeze half a lemon into your tea and slowly pour it over the henna, mix until you reach the consistency of mashed potatoes or yoghurt. Cover your bowl/container with cling film or a lid and let it rest overnight for 12-16 hours (don’t place it in a cold place). The acidic liquid will help release the red-orange dye.
Application
Wash and condition your hair, then use a microfiber towel to remove excess water (this towel is amazingly quick and effective for that) just enough to leave your hair about 70% dry. Henna makes a pretty good mess especially if you’re not used to it, so you should always cover the area where you intend the make the henna application as it stains everything. Don’t forget to also use some old clothes and a pair gloves. Although it is said that henna doesn’t dye your neck and ears I always apply vaseline on my forehead, neck and ears. You never know! You might be the exception to the rule. Anyway, part your hair in two or four sections and start applying the henna mix on your hair from back to front making sure you cover all hair strands, especially if you have grey hairs. Place a plastic cap on your hair and cover it with a scarf. Leave this on your hair for 4-6 hours.
Removal
I simply bend over my bathtub and use the head shower to remove the henna. It is a tedious and laborious task, but it’s well worth it. Some people find that using a cheap conditioner makes this task easier, but I never tried it. Follow with a moisturising deep conditioner or your homemade mix and enjoy the glorious results!
Important Notes: In this henna mixture I use the yoghurt with the intent to add extra nourishment and strength to my hair and although I don’t have any problems with it, it should not be used. Apparently, it interferes with the dye release and the dye-protein bond in the hair, but I did not notice this. To release the henna dye, you need to use a mildly acidic liquid. It is enough to use black or green tea, but I decided to squeeze half a lemon just in case. Using black tea instead of water also helps cover my grey hair along with the plant dyes. Make sure you buy your BAQ henna and plant powders from reputable sources. I always buy mine from SheaButter Cottage and they are amazing!
*Update* I have completely stopped using yoghurt in my recipe, for conditioning purposes, I do a good deep conditioning session using heat.
Have you used henna before? Share your recipes and results!

9 thoughts on “My Henna Hair Dye Recipe”
Great article! I’ve never tried henna on my hair… You share here very nice tips, I love that you’ve made your own recipe and describes well all the details on how to use it and remove it. Very well written!
Also, I really like your site! You’re doing a great work here!
Michelle.
Thank you Michele, it really means so much to me that you like this space!:)
I love that you can make your own hair dye! I really like the idea. I haven’t tried it yet, but I would like to. Thanks for the recipe!
You’re welcome Liz.
Hey love your article and gives ideas since I never used henna before. Will try it.
I’m glad you like my little recipe. Henna is wonderful, do try it.
Hi
Am trying henna and indigo today.
Kindly help. Do i deep condition after the henna treatment before i use the indigo or just wash with shampoo and proceed with the indigo?
Hi Omi,
For better results, do an oil pre-poo the night before the henna treatment. In the morning, use a clarifying shampoo to deeply clean your hair (read this) this gives you better results. Towel dry your hair really well and let it dry to at least 50%-60%, then apply your henna, remove it, apply your indigo, remove it and then use a moisturising deep conditioner or do your wash routine and then deep condition (I do this, if it’s too dry for you skip shampoo). Hope this helps.
I see you don’t monetize your page, don’t waste your traffic, you can earn additional bucks
every month because you’ve got hi quality content. If you want to know how to make extra
bucks, search for: Boorfe’s tips best adsense alternative