There’s nothing that can really prepare you for a life as a naturally curly girl. When I started my hair journey I had literally no idea what I was doing other than to stop getting hair relaxers. At the time, I had no goal to grow my hair to waist length (as I did) or become a curly hair blogger helping other naturalistas (who knew?!). My goal was simple – to stop my hair breakage and have healthier hair.
To be honest, I just went with the flow and figured things out as I moved along. However, since I am a strong proponent of doing things the right way I researched relentlessly not just reading blogs, on Facebook and watching YouTube, but reading scientific studies as well and through the opinion of real professionals to fact-check things (did I mention that when I’m interested in something I’m like a dog with a bone? I have to know and understand everything about it 😉 😀 ).
Yeah, it took a ridiculous amount of time and patience. There were times I felt I was never gonna make sense of it all… but you know what?! I did and I still love researching about hair/curly hair and I wouldn’t trade those moments for anything, they nurtured my love for curly hair and allow me to help you through this blog and the tools and services I provide.
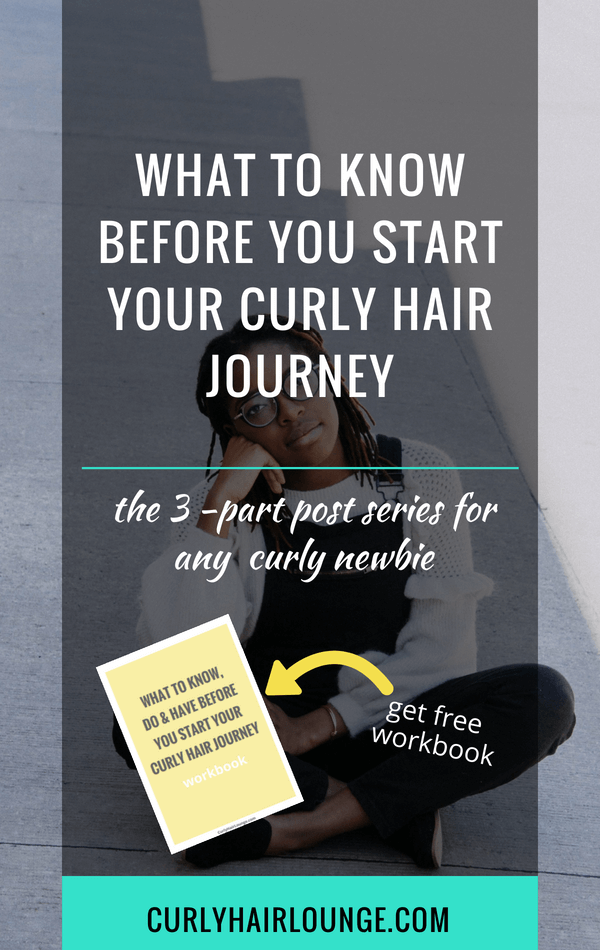
Still, I am aware that not everyone wants to have this level of commitment when becoming a curly hair girl that is why I am starting a 3-week series of blog post showing you the steps I’d take if I was starting my natural hair journey again, knowing what I know now. Here’s what you can expect:
- What To Know Before You Start Your Curly Hair Journey
- Hair Products And Tools To Have Before You Start Your Curly Hair Journey
- What To Do As You Start Your Curly Hair Journey
So, if you’ve been thinking about ditching the relaxing and let your naturally curly hair grow but don’t know where to begin, well, come along! I will guide you through the steps you need to take to start your hair journey. Ohh, and to make things easier I created a 9-page workbook to help you get through this post series.

Step 1. Decide. Do you Transition or Big Chop?
You can go natural one of two ways. You can slowly transition to natural hair or big chop your relaxed hair. Transitioning entails letting your naturally curly hair grow while trimming the relaxed ends regularly until there’s no more left or until you feel comfortable enough with the length of your new growth and simply cut the relaxed ends. It can last from a few months to a few years. It’s your decision when to big chop those final few centimetres of relaxed hair. I transitioned for 2,5 years… Yes, I’m a girl who can commit.
A Big Chop (a.k.a. BC) is your other option and is a more drastic one. You simply shave all of your relaxed hair and start your new journey with a bald or close to a bald head. An option that will suit the brave ones, the impatient ones or those detached from their head.
If you’re a ‘hair person‘ and like playing around you may have more fun transitioning. If you’re more adventurous and like to try different things doing a big chop will fit you perfectly.
Step 2. Hairstyles. What are you going for?
When it comes to hairstyles or how you’ll style your hair the thing you’ll most hear about as a newbie is the need to do protective or low maintenance hairstyles to keep hair moisture, avoid split ends, hair breakage and retain hair length.
These hairstyles entail keeping the ends of the hair tucked in and protected in buns, updos, bantu knots or even styled braids and twists (Protective Styles). Alternatively, you can also do braids or twists, braid outs or twist outs, bantu knot outs or any style where you don’t need to restyle or manipulate your hair often (Low Manipulation). There is also the option of using hair extensions or wigs while keeping the hair underneath cared for.
It may seem unimportant to be thinking about hairstyles before you actually start, but this may have a bearing on whether you go for a BC or transition. If you BC there won’t be many styles you can try or do until a certain length is reached. With a BC you’ll also be dealing with your hair texture right away discovering its likes and dislikes and getting used to a completely new hair texture.
Consider if you want to rock your TWA (teeny weeny afro) and sass up your look with accessories and makeup?… How comfortable will you feel? Can you handle the different stages of hair growth? Will you want to use extensions until a certain length is reached?… There’s a lot more to think about than you thought of, isn’t it?!
If you transition, you have more hairstyling options but you’ll also be dealing with two different hair textures (what I often call ‘bipolar hair’) which can be stressful. The new curly growth will be stronger, wiry, more voluminous and rebellious while your relaxed hair will be weaker, straight and limp. You can blend both textures by making braids, twists or bantu knots or you can use tools (we’ll talk about these in the next post of this series) to achieve amazing looks and start experiencing on some of the versatility natural hair can give you.
As you can see, transitioning involves a lot more hands-on work and time. You need to think if you’ll have the patience, time and willingness to learn new skills right away (Transition) or learn as you go (BC) while seeing a new you in the mirror.
Finally, the choice to wear your hair in low manipulation or protective styles, in hair extensions or wigs, blended or not is your decision, you can simply wear it out. However, my advice as someone who transitioned for 2,5 years, is that the less manipulation the better, it helps avoid breakage at the line of demarcation. Also, blending the two hair textures will make your hair look tidier. Unless, of course, you don’t mind (I did) walking around with dangling strings of dead hair coming out of puffy hair roots and looking like a deranged woman at times, after all, it’s your hair! 😉
Step 3. Deepen your knowledge of hair
It may seem like hair is just hair and there’s not much to it but curly hair or hair of African descent is different from Caucasian or Asian hair, it has characteristics that make it naturally dry and more vulnerable to hair damage. It’s important you know how and why this happens so you can understand how to take better care of your natural hair.
You can look it up on the net, read books, follow his website (:P) or you can take my 8-day eCourse – Boost Your Hair Moisture – that will quickly guide you through the dynamic between curly hair and moisture, how to discover your hair needs, hair products and moisture retention, etc. You can have a look here.
Step 4. What will your hair product approach be?
I bet you’re thinking, what’s there to know about hair products? Can’t I just keep using the same old products? Well, yes you can! However, many products in the market are formulated with ingredients that don’t necessarily promote the health and growth of hair in general and of curly hair in particular since it requires a little more TLC.
As it happens, many women in the natural hair community (me included) avoid a number of ingredients in their products because they are known to cause allergies and/or make curly hair dryer and more susceptible to breakage.
Some of the common ingredients avoided are:
- Petroleum-based ingredients (i.e. mineral oil, petrolatum) – these ingredients provide a barrier delaying the loss of hair moisture to the environment, they seal the hair against the environment preventing it from taking too much moisture from the air and becoming frizzy, they lend softness to the hair and they facilitate detangling. All good things I know! However, these ingredients require the use of other strong and drying ingredients to curly hair to be removed. There are better alternatives.
- Silicones – Used to condition, lubricate, provide shine, help with detangling and more. The problem with silicones is that they create a strong film around the hair shaft that is very hard to remove because many of them are not water soluble creating build up on the hair and preventing hydration. Again, the solution is to use strong cleansers to remove them which causes dryness to curly hair and can lead to breakage. To avoid this issue you should choose water soluble silicones. Lucky for you I have a free PDF list of insoluble, water-soluble and curly girl friendly silicones you can grab when you sign up to my resource library. You can do it here.
- Sulphates – a category of surfactants used in shampoos or cleansing hair products to remove product residue, dirt, sweat, oil or air pollution from the hair. They are very good at what they do but they’re also drying to our hair. The best solution is to avoid strong surfactants like Sodium Lauryl or Laureth Sulphate, Ammonium Lauryl or Laureth Sulphate, Sodium Cocoyl Sarcosinate or Ammonium or Sodium Xylenesulfonate or TEA Lauryl Sulphate. Instead, go for mild surfactants like Cocamidopropyl Betaine, Sodium Lauryl Sulfoacetate, Sodium Cocoyl Glycinate. Read this post for a more in-depth discussion and list of ingredients.
- Alcohols – there are good and bad alcohols and the good ones help your hair stay moisturised. The ones you should avoid evaporate quickly and are drying to our hair. Look for and avoid Alcohol, SD (Denaturated) Alcohol, Isopropyl Alcohol, Isopropanol or Propyl Alcohol, Ethanol Alcohol and Propanol. Good alcohols (fatty alcohols) to have in your products are Cetyl, Cetearyl, Stearyl or Lauryl Alcohol.
In addition to these, some people will also avoid ingredients they are allergic too and/or ingredients they feel are not healthy such as parabens, colourants, some preservatives and more. You will have to do your own research to find out where you stand in this issue. Generally, speaking the ingredients above are the most problematic to curly hair and the ones avoided by most.
If you decide you don’t care much about this try to at least have these ingredients lower in the list of ingredients as their negative impact on your curly tresses will be lessened. Make sure there’s also moisturising ingredients in those products (fatty alcohols, hair butters, humectants, vegetable oils).
Step 5. What will the origin of your product ingredients be?
I know, I know, it kinda sounds like we’re debating the same thing, and in a sense, we are because they’re connected, but they’re slightly different. So what you’ll have to consider here is something that is the subject of a debate within the natural hair community – whether to use natural or synthetic ingredients in your products.
I wish I could tell you the things were this simple, but they never are, right?! While some naturalistas texture completely renegade products with the synthetic ingredients they once used and now only accept natural and organic ingredients in their products, others are more relaxed about it and don’t mind the origin or their product ingredients as long as they’re not ‘harmful’ and/or drying to their hair.
As you might have guessed, there is a middle ground here where you can favour products mainly based on natural or naturally derived ingredients (ingredients of natural/organic origin but man-modified) and some synthetic ingredients.
Luckily, the industry as caught up on this market demand and you can find many hair care brands formulating their products with 100% natural and/or organic ingredients or the closest possible to it. To help you make a decision, you can read more about this debate here. When it comes to product ingredients I have found that my preference goes to products that have all or most of their ingredients natural. If a product has too many synthetic ingredients my hair doesn’t seem to like them as much.
Think about this subject as when you have a fizzy drink or junk food. They get you high and give you immediate satisfaction, but then comes the crash of empty nutrition – bad humour, more hunger and health problems. For my hair, products full of synthetic ingredients can make it feel and look dehydrated quicker, coarser and dull.
Oh… before I forget, there is another option here, which is to DIY your own products. You buy your own raw ingredients and make your own concoctions at home. However, care should be taken that they are pH balanced as it can affect the pH balance of your hair and scalp and trigger hair conditions such as itchiness, dandruff or a fungus. I used to do a fair amount of DIY, but these days I don’t have the time or patience anymore, I stick mainly to my flaxseed gel when it comes to DIY. 😉
Step. 6 Get to know the lingo before you jump in
Know when someone tells a joke you don’t get but everybody laughs so you also laugh ’cause you don’t want to look weird or dumb? Or when you’re in a group conversation trying to get a word in but you don’t understand anything and you stand there smiling awkwardly? Yep, that’s how it can feel when you jump into the natural hair community and you have to learn a whole new lingo.
Back in my day, whenever I was reading some curly hair related thing I often had to google a term or an acronym to make sense of what I was reading, which was annoying and time-consuming. It’s important to catch up on the meaning of words/terms like humectants, emulsifiers, occlusives, BC, TWA, CG, porosity, hygral fatigue, etc. There is a lot to learn and the sooner you make sense of what you’re reading the better you’ll be able to apply the knowledge to your hair routine and the fewer mistakes you’ll make.
Of course, you can always learn the lingo as you set on your curly hair journey, but why do that when I’ve created The Handy Natural Hair Jargon Translator that you can download and print giving you the shortcut to all that?! Whose your girlfriend!? 😉
No more awkward smiles or feeling out of place, for sure!
Okay guys, if you’re thinking about going natural or you just started your hair journey I hope this post brought you some insight and got your head in the game. Don’t forget to download the workbook that comes along with this post series, it will help you navigate through all the information and sketch an initial plan. When you sign up for it you will also have access to all the other free resources I mention in this post.
In the meantime, you have until next a week to work on these steps from this post! Next week I’ll be talking about Hair Products And Tools To Have Before You Start Your Curly Hair Journey. 🙂
If you enjoyed this first post in our series, don’t hold yourself! Share the love with your tribe by tweeting this short message. They’ll thank you for it! 🙂
Are doing the big chop, transitioning or are you still on the fence?
Related posts:
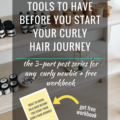 Hair Products And Tools To Have Before You Start Your Curly Hair Journey
 6 Easy Steps To Start Your Journey To Natural Hair
 5 Reasons Why Sectioning Your Curly Hair Will Make Your Hair Journey Easier
 7 Protein Free Moisturising Hair Treatments For Curly Hair
 7 Reasons You Should Start Growing Your Naturally Curly Hair
2 thoughts on “What To Know Before You Start Your Curly Hair Journey”
Waiting for the next post :))
Still in the process of starting my curly hair journey and getting a routine, it is so expensive. :((
Luckily, the wait is not long (1 day). Glad you enjoyed this post. 🙂