Hey, welcome back to post two of the 3-week blog post series where I’m showing you what you need to know, do and have before you start a curly hair journey. Today, we’ll be talking specifically about the basic hair products and tools you need to have to give your hair the TLC it needs. As you know, hair products are essential in a healthy hair regimen as they help give your hair the hydration and nutrition it needs. Tools will facilitate your hair care practices and oftentimes support your efforts to maintain hair moisture and achieve hair health.
If this is your first time to the blog or you missed the first post in this 3-part series than you can catch up here:
There’s also a nice little workbook that accompanies this post series. It’s a 9-page workbook you can download and work on as each post is released. This way you’ll have an initial plan for your hair journey.

Alright, then! Ready, to dive in? Right, let’s get you spending some cash on products and tools! No, no, no… I was just kidding. There’s only info gathering here, how much you spend and when you spend is up to you. 😉 😀
Yes, today’s topic seems to excite and confuse a lot of naturalistas. For some people getting to buy and try hair products appears to be one of the best parts of being a curly girl for others it’s the complete opposite. People don’t know what to buy, what products are for, how many products they need and honestly I don’t blame them.
People are bombarded with marketing tactics that make them believe they need X, Y, Z and A, B, C to maintain and style their hair. I mean, from pre-treatment oils to scalp stimulating and hair growth ‘potions’… take your pick!
This is also one of the things that feed the myth that going natural is expensive, but the truth is you don’t need to fill an entire bookcase with products to have what is needed to take care of your curly tresses. And as for your hair tools, there’s not that many you need and some of them you probably already have in your house.
Oh, and to help keep track of everything I got this neat little workbook you can download to guide you through this post series.
IMAGE
HAIR PRODUCTS
#1| Get your shampoos
1. Regular Shampoo
Yes, I said shampoos as in more than one. You’ll need two, no negotiation. One shampoo will be used regularly on your wash day to remove dirt, product residue, air pollution and sweat. Preferably, this will be your sulphate free shampoo as it’s less drying to your curly tresses. You can check some here.
However, if the ingredients in your products and their origin are something you’re not concerned with, I would urge to at least think about doing an oil pre-poo before you use your shampoo. This will help guard your hair’s lipid barrier (sebum) against excessive depletion from the use of harsh (sulphate) shampoos. These shampoos make your hair feel dry and rough to the touch.
2. Clarifying Shampoo
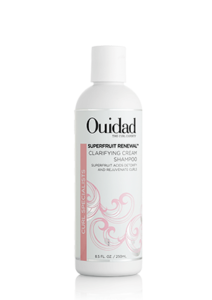 Your second shampoo will be a clarifying shampoo. These shampoos help remove buildup from product ingredients that form a film around the hair strand to make it feel soft, smooth, shiny and easy to manipulate and detangle such as silicones or cationic ingredients. These shampoos are also capable of removing hard water minerals which prevent water intake from the hair.
Your use of this shampoo will be more occasional. You’ll use it when you feel your hair is ‘flat’ or is not responding to your products as usual and/or feels dry. This will depend on a number of things and you can know more about it in this post, for product suggestions and what to look for in your clarifying shampoos read this.
NOTE. Co-Wash or Cleansing Conditioner?
Are you wondering about co-washing?! Well, if you heard about it you probably are. Co-washing doesn’t completely ‘free’ your hair of all product residue to enable hair hydration. In fact, they deposit conditioning ingredients to make your hair feel soft. I view co-washes as a mid-week option to refresh the hair in between your wash day. You’re free to get one if you want to.
#2| Conditioner
I’m sure I don’t need to tell you must have this item in your product stash, do I?! 😉 Conditioners are great because they ‘flatten’ the hair cuticles after the use of your shampoo locking in water and making your hair feel soft. They also facilitate manipulation, detangling, reduce tangles and knots among other things. When it comes to this item you’ll need two different ones – a regular conditioner and a deep conditioner.
1. Regular Conditioner
Though there are some hardworking conditioners, a regular conditioner will work mainly on the surface of the hair and within the internal structures of the cuticle layer (yes, it also has layers!) depending on the formula. If you don’t notice immediate conditioning and melting of your tangles and knots you should look for a better one.
2. Deep Conditioner
These are hardworking conditioners that able to provide your hair intense moisture, nutrition and repair. They work both outside and within the structure of the hair and they are able to rehabilitate and increase hair healthy with regular use. There are different types of treatments and you’ll need to make sure you balance your hair’s moisture and protein needs, as too much of one thing can cause hair damage. As a beginner make sure you have at least a moisturising and a protein deep conditioner.
Psst. Did you know I wrote a whole eguide about deep conditioning so you can master your treatments, increase your hair health and reach your goals?! Yep, you can check it out by clicking the image below.
Tip. You don’t need to use both your conditioner and deep conditioner in your wash day and in this order. Use the deep conditioner after your shampoo to allow deep and better penetration of active ingredients. You can leave out your regular conditioner or use it after your deep conditioner. Here are some more ways to use your deep conditioner effectively.
#3| Moisturiser
This is a category where things can get a bit crazy and tricky. Get yourself a moisturiser, a product that is water based and has ingredients that draw water into the hair (humectants) and ingredients that will help it stay there (fatty alcohols, vegetable oils, butter).
In this category, the industry has many products with different names some of them are leave-ins, cremes/creams, smoothies, hair milk, moisturiser… Some won’t even have these denominations written on the label as brands come up with some inventive names, however, just remember that they need to have water as their first ingredient.
Which one you choose will depend on a few things like your hair texture, density, the style you want to achieve and how it feels on your hair. For instance, fine, low-density hair will probably not like a product with a heavy consistency and high on oil content as it will weigh it down. Still, there may be a few people who enjoy this. You’ll have to experiment. You only need one product in this category, but you can have more, most curlies do.
#4| Butter
Having a butter creme or butter based product will be a great addition to your product cabinet they’re awesome for hairstyles with braids, twists, bantu knots and similar styles. Still, it’s possible you may enjoy a buttercream with a light butter content for other hairstyles (I do! 😉 ).
#5| Styling
In this category you can find many products… gel, foam, mousse, custard, jelly or curl defining creme/butter or souffle which are kind of a mix between your moisturiser and your styling product. These products will give your curls and styles definition and hold. You may pair your moisturiser or your butter with a styling product to make your styles stand out and/or last longer.
Again, you don’t need to have all different sorts of styling products. If you’re on a tight budget have one or two different ones as they’ll give your different results and ‘curl holding power’.
These are the basic products you’ll need to take good care of your hair. Thinking about vegetable oils or natural ingredients for DIY?… Yes, you can get them but your products will already have these ingredients in them to nourish your strands. What about an edge tamer or pomade, you ask? I find them unnecessary as an everyday product since a regular gel will also help control your edges. However, if you have a special occasion like a christening or wedding they will put your curls in formation for the whole day. For a more in-depth information on products, you can read this post.
Ready to move on to tools? Great, there’s not many of them.
Basic Hair Tools
#1| Satin Pillowcase or Bonnet
These two items are meant to help your hair keep its moisture while you’re sleeping. If you don’t know, cotton pillowcases remove moisture from your hair which makes your curly hair look and feel dry. There’s no need to have both, choose the one you think you’ll be more comfortable using. I, personally like to use both because my bonnet tends to slip off my head, so to make sure I’m covered I also use a satin pillowcase. 😉
#2| Detangling Tool
You’ll hear time and time again that the best detangling tool is your hand (s) and you need no other. To a certain extent, this is true using my hands exclusively to detangle my hair allowed me to become more aware of its fragility and limits and be more gentle when handling it. However, it is my experience that it is not enough to fully detangle our curly hair. It needs more! You can start detangling by using your hands or not and/or finish off with a tool. Here are some options:
#3| Deep Conditioning Tool
Even though you can certainly leave your deep treatment on for 3-5 minutes on your hair while you are showering, curly hair benefits the most when this session lasts 20-30 minutes, preferably with applied heat, especially low porosity hair. There are many ways you can go about this and one of them doesn’t even cost you money. Let’s go over them:
- Plastic bag or cap or cling film (read for tips)
- Heated Cap/Wrap
- SoftHood HairDryer Attachment
- Steamer
#4| Towel
There’s nothing like snuggling down in a cotton towel after a shower, however, they’re not the best choice for your hair since they remove too much moisture from the hair and promote frizzy hair, not to mention they can snag and snap your hair. The best choice is using a microfiber towel, a t-shirt towel or a simple cotton t-shirt which you are sure to have around the house and will cost you no money. 😉
These options are much more gentle removing less water from the hair, reducing frizz, snaps and slipt ends.
#5| Hair Blending Tool
Though not necessarily mandatory for the success of your hair journey, hair blending tools will certainly make it more enjoyable especially for those not transitioning and who like to play with their hair. However, having spent 2,5 years transitioning to natural hair they were not only essential to blend my limp relaxed hair with my natural hair for a better look but they also helped me develop a better relationship with my hair.
 Yes, they are basically an aesthetic solution but let’s not underestimate the impact our self-esteem can have this hair journey. It can literally dictate its ends. A few of your options are Curlformers, perm rods or flexi rods. There’s no need to buy them all, go on YouTube, watch a few different video tutorials of people using these tools and chose your prefered one.
#6| Satin or Silk Scarf
Relaxed hair will, for the most part, be tamed and/or easy to control. Naturally curly hair, on the other hand, will be the exact opposite. However, there are a few things we can use to have some control over it and a satin or silk scarf allows us to do that precisely.
They can be used to lay down your edges and achieve a more sleek look, to do a pineapple and control the mightiness (read volume) of your curly when bedtime comes or even has a hairstyling option. You can use a simple satin scarf or choose from some African inspired scarfs like those from Constant Covering which are satin-lined.
There are many more tools you can get your hands on that will make your life easier and this may include a spray bottle, bobby pins, hair ties, a moisturising pillowcase (yes, that exists) and more. Some of them you may already have, but if you want to know my list of favourites you can have a look here.
Right, there! We are finished as far as curly hair products and tools are concerned. Next, we’ll be talking about What To Do As You Start Your Curly Hair Journey. This is the last post in this series so make sure you don’t miss it! 😀
In the meantime, if you’re enjoying this post series share it with your friends. Click the image below to tweet a pre-written message (Hey, you’re totally free to change it!). 😉