(Update: my hair routine has changed tremendously follow my most recent post for my latest advice. Life isn’t static, we learn and we grow! My experience and knowledge have changed and so has my hair routine. 😉 )
“Being natural hair girl is too expensive!”
I hear this all the time and I’m sure you do too. Maybe you even believe it, but I don’t. I managed to transition with very few hair products, it’s only now that I’m natural that I have been experimenting with some new products and, of course, spending a bit more. But nothing that can break the bank or make me stock products I’m not using. Trust me, I used them all. The point is, it is totally possible to build a curly hair care routine that is within a budget.
There are several myths people have, about being natural, that are just not true. I can understand the fascination it is to be introduced to the wonders of 100% natural products and ingredients, to have countless brands all ‘demanding‘ your attention and wanting to try everything you see your favourite YouTubers use. I had that fascination too… for a few short seconds (I’m very pragmatic and frugal. This may sound like I’m no fun, but believe me, I am!).
How I Escaped The Hype
Yes, I managed to escape that trap for a few reasons, (1) I didn’t want to spend or had a lot of money to spend on hair products that were more expensive, (2) I was okay with doing some DIY, (3) my main rule was to avoid ingredient that took moisture from my hair, not on brands or using products with only natural ingredients.
Even if you’re reading this and thinking DIY is not in the charts for you, that’s fine. I’m not saying DIY is the route, but doing 1 or 2 easy recipes will help, I’ll show you. I find that the problem people have with keeping within their budget is that they wanna buy everything under the sun thinking they’ll have the best, most healthy, strongest, growing hair they’ve ever had plus, they’re listening to everybody else and getting distracted by the bright lights (especially when you’re a newbie).
“No way hair breakage, dryness, stunt growth or any other ‘hairmageddon‘ is gonna come knocking on my door! I’m stocked up. So and so say this is the best for….” – is this something that crossed your mind?
The Problem With…
The problem with this kind of thinking is that (1) people don’t take into account their hair needs, (2) they get it wrong by thinking ‘too much is better than too little’, (3) they may still be attached to the old mentality of looks over health and (4) they don’t understand that much of hair’s health comes down to the practices and behaviours you have.
If you’re not using your products right, you can be damaging your hair even if they’re good products (like applying vegetable oils without moisturising first). Plus, your hair really doesn’t need that much to be happy!
If, by now, you’re thinking you don’t really know anyone that (1) has such a frugal stash of hair products, (2) that is not a product junkie and (3) manages to not break the bank while being a natural girl, then look no further – I’m the one you’re thinking of.
My mission today is to show you it is totally possible to be a natural hair chick without breaking the bank. Don’t believe me?!… Good, ’cause I’m about to cross one more myth off of your list 😉 . I’ll give you some examples of the products you need to have a good hair regimen and what I used while I was in transition that allowed me to have my curly hair past bra-strap length when the time came to cut my relaxed hair on big chop day.
Let’s get cracking, ’cause there’s a lot to cover!
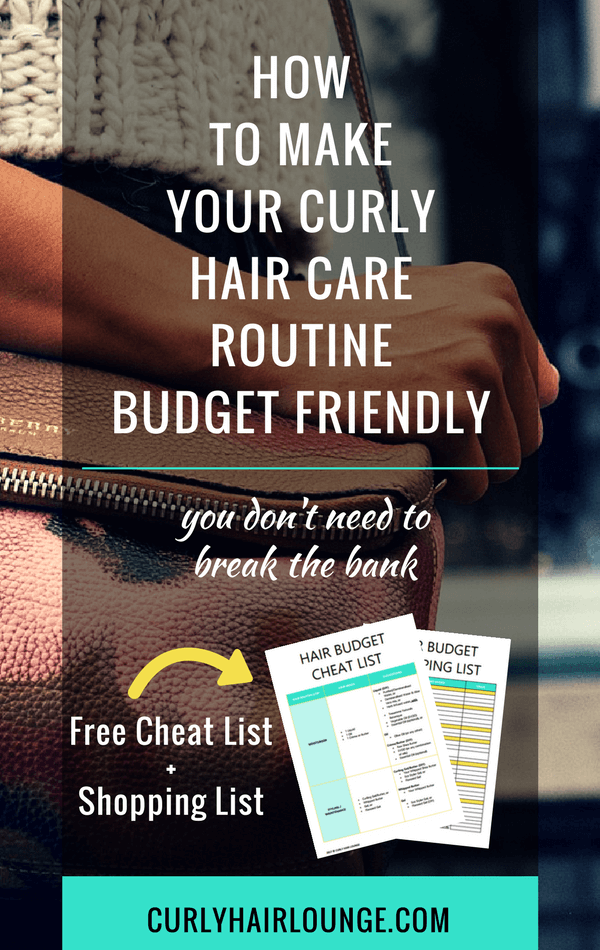
Oh… before we get started, there is a Hair Budget Cheat List and Shopping List that accompanies this post with all the product suggestions you need to help you control your budget. 😉

Pre-Cleansing
These normally include pre-poos and for this, you can use a vegetable oil, a conditioner or a mixture of both. Vegetable oils are great to use as a pre-cleansing treatment because they can help with detangling, give extra nutrition to your hair that helps improve elasticity (hair bounce), improve moisture retention and even protect against sebum depletion from stripping shampoos.
Conditioners are also a good option when you wanna ease the task of detangling (especially for Type 4 hair) and, of course, you can make a mixture with your favourite oil or apply one (oil) and then the other (conditioner).
OILS
There are a lot of good vegetable oils out there and they have specific characteristics that are unique to their composition. Some will be good for the prevention of scalp conditions, others mimic your hair’s natural sebum. However, there’s no need to choose a vegetable oil according to this or to even buy oil blends advertised with all sorts of ‘magical’ powers. Don’t fall into the hype, please! You will find that virtually every oil you choose will have properties that are good for your hair, so you can go for just one.
If you’re going to say a blend will stimulate hair growth and better hair health, I’ll remind you that you can do the same with just one oil. How? Continue reading…
Furthermore, some trendy oils like real Moroccan Argan oil will have a pretty hefty price tag. Don’t get me wrong, it’s a great oil and I’ve recommended it here on the blog before, however, there’s no need to splurge on this if you’re on a budget.
What I Use
During my hair transition and up to this day, my pre-poos are done with the good ol’ olive oil that you can find in any kitchen cupboard. There’s no need for expensive or exotic oils. You can easily find this well-known vegetable oil anywhere, just make sure it’s cold-pressed extra virgin olive oil (EVOO). It’s good for your hair and scalp, it’s inexpensive, it can seal and penetrate your hair, and you can use it for more than just pre-poos.
If you’d like to mix oil and conditioner, you can use any cheap conditioner you find. Just make sure it doesn’t have any hair drying ingredients in it. You can use something like Tresemme Naturals Botanique or Herbal Essences Hello Hydration which are cheap and come in a reasonably sized container.
If you’re looking to stimulate hair growth, you can take your chosen oil (it can be olive oil, coconut oil or any other) and drop some herbs (peppermint, rosemary, ginger root, horsetail, …) inside the container and, BOOM! magic happens – you have a powerful oil infusion. Alternatively, you can use some drops of essential oil (same herbs), check which one comes out cheaper to you.
To buy these items, you can use Sheabutter Cottage, Amazon or any other online shop. I personally love Sheabutter Cottage, I know the owner, have used her products and I can not rave enough about them.
Cleansing/Shampooing
With all the bad reputation drying sulphates got these past years, it’s understandable, and even desirable, that you avoid these. However, they’re not all the same, there’s a spectrum among them. (you can read more here). Still, the strong ones leave our curly hair depleted of its sebum, vulnerable to external damage, unable to retain moisture and prone to breakage.
If you’re on a budget there’s no need to run for the natural ingredient brands. Why?! Because (1) many times what is advertised is not what’s in the bottle (always read the label!), (2) if you’re running from synthetic ingredients, many natural brands use them too, (3) though they’re worth it, natural products are generally a bit more expensive (and that’s okay, quality ingredients have a price) and (4) there are mainstream brands that offer a good middle ground.
When it comes to cleaning your hair you need to have 3 items: something that is able to remove oil, butter, dirt and sweat (Flora & Curl Superfruit Shampoo is a good option), a co-wash for a mid-week moisture boost and a clarifying shampoo to remove hard water minerals and stubborn build up.
What To Buy
Shampoo
To clean your hair there are several affordable things you can use. You have Black African Soap which is an effective hair cleanser and people claim (I haven’t tried it) they are gentle and soft on your hair. However, according to Tonya McKay, a polymer scientist, they work better with soft water. If your water is hard they tend to attract water minerals which adsorb onto the hair and create buildup that dries the hair and is not removable with a regular shampoo.
Mud washes with bentonite or rhassoul clay are another favourite and they have the advantage of being good conditioners. You can find them all at Sheabutter Cottage or Amazon. However, if you use a lot of oils it’s best if you use a sulphate free shampoo.
Castile soap is another cleanser you can use that is made out of olive or coconut oil but should be used diluted in a ratio of 1:3 (soap: water) to avoid drying your hair and scalp (you can also do an oil pre-poo to minimise this). If you like DIY’ing there’s a shampoo recipe here on the blog with soapnuts. The good thing about these nuts is that they are soft on your hair and can be used several times to make your shampoo. Lastly, you can buy a sulphate free shampoo with a good size container like Palmer’s Moisture Repair Shampoo. (this one has protein and is good for damaged hair) or Shea Moisture’s Raw Shea Butter Shampoo (I love this moisturising shampoo!).
Co-Wash
I know a lot a people like to stick to co-washing to avoid drying sulphates and keep as much moisture in their hair as possible, however, if you clean your hair with nothing else you can be doing your hair more harm than good. Co-wash is not able to remove all the oils, butter and product build-up from your hair. However, they do have a place in your hair routine (mid-week moisture boost, and occasionally on lazy wash days. 😉 ).
For co-washes, you can use any silicone-free conditioner you have like the Tresemme Naturals Botanique I mentioned before. Herbal Hessences Hello Hydration Conditioner is also a choice for many naturals, however, if you’re looking to save some cash, Tresemme will give you more product for your money. For more on product options, read 12 Co-Wash & Cleansing Conditioners For Curly Hair.
Clarifying
You may want to skip this one but is very important to have a clarifying shampoo. Although some silicones can be easily be removed with a sulphate free shampoo, others are very hard to do so. Moreover, minerals on your water accumulate on your hair over time and they need to be removed because they’ll prevent your curly hair from taking in moisture. The end result will be dry hair and breakage.
My personal choice of affordable clarifying shampoo is Herbal Essences Dazzling Shine, but you can also use Pantene Deep Cleanse Purifying Shampoo. Many people like using bentonite or rhassoul clay, apple cider vinegar or baking soda for this particular practice. Still, against the popular trend, I don’t subscribe to these methods to clarify my hair. Why? Because until now, I have found no scientific proof (please let me know if you find a study) that they are able to remove buildup and hard water minerals.
Though a regular clarifying shampoo as drying sulphates the way I counteract this is to do an oil pre-poo every time I use it (use olive oil overnight or coconut oil). Additionally, since I only clarify once a month (or twice if I use a lot of oils) there is no harm done. For more on clarifying shampoos read 4 Sulphate Free Clarifying Shampoos That Will Infuse Life & Bounce Back To Your Curly Hair.
How ya doin’ so far? Too much to remember?! Then download the free Hair Budget Cheat List and Shopping List from the free resource library and join our community.

Conditioning
When it comes to hair conditioners it’s imperative to have a conditioner that has good slip and makes the task of detangling natural hair easier. It definitely has to ‘melt’ down all the knots and tangles. You’ll want to find one that doesn’t have nonsoluble silicones and all the normal drying ingredients.
What To Buy
There’s no need to use a different conditioner than the one you already use to pre-poo and co-wash, by doing this you’re already saving some serious money with these products’ versatility. 😉 :D. Tresemme Naturals Botanique or Herbal Essences Hello Hydration is just fine. To this day I still use Tresemme. As an option, and if you like using clays you can use bentonite or rhassoul. Here are some other affordable options for conditioners.
Deep Conditioning
Moisture and protein balance is important to have because you want to keep your hair’s needs fulfilled. Our hair needs moisture because it’s naturally dry due to its shape, but it also needs protein – its main component. Therefore you need to have a moisturising and a protein deep conditioner or mask.
However, if you have bleached or dyed hair or if you regularly use heat styling tools, you need to do a stronger protein treatment occasionally. You can know more by reading Know Your Deep Conditioners And Jump-Start Your Results and 2 Things You Need To Know To Build Your Hair Routine.
What To Buy
A mainstream deep conditioner I used for moisture for a long time for my transitioning hair (not anymore) was Pantene Repair and Protect. It has a soluble silicone and does its job. Other options can also be Vatika Naturals Deep Conditioners, you have the Egg Protein mask, the Tropical Coconut or the Almond one for moisture. For more options, you can also read 7 Protein Free Moisturising Hair Treatments for Curly Hair or 7 Protein Treatments To Strengthen Curly Hair.
For a stronger protein treatment (reconstructors) for seriously damaged hair, you can use Aphogee Two-Step Protein Treatment. Alternatively, DIY’ing can be another route for you. You can easily take your Tresemme conditioner and add some oil, honey, sit under a hooded dryer and you have a moisture treatment.
For protein, you can use avocado, egg or coconut milk. Just be aware that this protein treatment won’t penetrate your hair, it will sit on the surface of the hair and most will be washed away. It’s better to invest in a well-formulated product. For more on DYI’ing read Know The Basics To make Your Natural Hair Homemade Deep Conditioner and 5 Homemade Natural Hair Recipes For Your Entire Wash Day.
Please don’t make DIY part of your regular hair routine. No amount of homemade concoctions will give your hair the amount of well-balanced nutrition a well-formulated water-based botanical product will. Plus, you can spend all that time spent concocting doing something you enjoy.
Moisturising
This is an important step in your hair regimen and you gotta make sure your hair is well moisturised, otherwise, all previous steps are pointless. However, you don’t need to buy the price tag of a product to make sure your hair is always well moisturised.
In all my years transitioning and being natural, I have found that the LOC method (LOC = Liquid+Oil+Creme or Butter) is the best way to keep curly hair moisturised. I have tried the Curly Girl method but it didn’t work as well as the LOC method. For this method, you can buy all your products, or you can do what I do and make them! (well, except for one product 😉 )
What To Buy
Liquid
This part of the LOC requires a water-based product, you can use a leave-in conditioner (liquid or creamy will depend on your preferences). I like to mix filtered or demineralised water with some of my Tresemme Naturals conditioner with vegetable oil (I put more than 1, but it’s fine to use only 1) and some essential oils (this is optional. I like Tea Tree and Peppermint or Eucalyptus). Give it a shake and it’s ready to use, no money spent here. Alternatively, you can mix water and glycerin
Alternatively, you can also make your liquid with a mixture of water and glycerin (1:3 ratio) maybe add some drops of essential oil or not… you can also easily substitute water with some herb-infused water and mix all the rest or even use aloe vera. There are several ways to go about this. Here are some easy DIY options.
Oil
It’s preferable if you use a sealing oil to keep all the moisture inside your hair once you’ve applied your liquid. Olive oil is a penetrating oil but does take a while to get inside the hair structure because it is a bit heavier than other penetrating oils. You can use it or you can use almond oil, castor oil or grapeseed oil. I’ve made a PDF cheat list of penetrating and sealing oils you can get it inside the free resource library, click here!

Creme/Butter
If you buy a 1kg/35OZ container (+- £20) of shea butter or any other butter, add an oil or two to reach your preferred consistency and then whip it into a light cream this butter container can last you over a year (it has for me, and I have waist long hair and am heavy-handed with my products). Plus, you already have your oil.
The price for a ready-made creme or butter is around the same price mark (£20), sometimes more, sometimes bit less. You may think this is better, but you’d need to buy this product every 6 or 8 weeks (and this depending on your hair texture and needs, its length, your usage,… It could last even less!). For sure, you’d end up spending more over a year, even if you have to refill on your vegetable oil. Think smart! Here’s a recipe.
Note. Doing this LOC Method means you’re using lots of oils and butter, so you need to use a good sulphate free shampoo to clean your hair well or they’ll create builup very easily (again Flora and Curl is a good option). Also, factor in a clarifying shampoo you’ll need it too. And please don’t overdo it during the week using oils/butter. If your hair is well cleaned and moisturised you don’t need to moisturise your hair every day! (Read Do You Moisturise Your Natural Hair Properly?)
(Update: I don’t do the LOC Method or DIYs anymore.
Styling/Maintenance
To get the most out of your hairstyles curlies around the globe resort to gels, mousses, curling gels, souffle cream or butter, whipped butter, and more. The choice is vast and can make you wanna try everything, but you can still save some money here if you use your whipped butter from the LOC method ( I often do this for my twists and braids). Still, there are other options.
What To Buy
For someone who is starting out and wanting to save some money, doing a little DIY may be the perfect option. There are a lot of affordable brands out there like Cantu, Palmers and the like, but many of them have petrolatum, mineral oil and even silicones in their formulas and these are ingredients I advise you to stay away from, especially when you’re starting out and don’t know how to use them to your advantage.
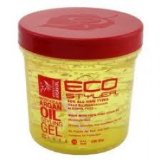 With that being said, EcoStyler Gel is a favourite of many naturals because it’s very cheap and gets good results. It doesn’t have the best ingredients in the world but when used sparingly and responsibly this gel can be a good addition to your stash (make sure you moisturise first). Use sensibly as it has protein and too much can damage your hair.
You can buy the gel to mix it with your whipped butter and you get a curling gel/creme/butter (set aside some of your whipped butter to make this mixture and get 2 different products!). Or, you can use the gel on its own after your LOC method. Here’s are some recipes.
You can also make your own gel with flax seeds, you can use this recipe, it’s super cheap. The seeds can be stored in the fridge and used several times (just like the soapnuts for your shampoo! 😉 ). When making this gel to use on its own or added to a concoction, make it so that you will use all of its content within 1 to 2 weeks maximum, and always keep it in the fridge. Water can easily attract bacteria and since you’re not using an antibacterial or fungal ingredient to prevent this, you should make small batches (this applies to all water-based DIY concoctions you make!!).
You can also make hair strengtheners if you feel your hair is breaking a little. All you need to do is make some black or green tea, put it in a spray bottle and use it to refresh your hair during the week. You can also use part of it for your leave-in conditioner. You can, later on, add some essential oil if you want to… it’s up to you. Also, check this gelatine recipe as well.
I hope that after reading this long post on how to make your curly hair routine budget-friendly you will consider your product choices and realise that being natural is not expensive. I understand that a lot of the options in here are pushing you towards the DIY Avenue, however, if you make your choices well you can use your savings and invest in a pricier product. Plus, they’re easier to make than cooking a meal. 🙂
Don’t forget to download the free pdf that accompanies this post and start taking control of your expenses. But if you rather get to know my top list of products, tools, accessories and the brand names I like you can check this page.

(Update: I don’t do the LOC Method or DIYs anymore. Follow my most recent posts)
